Engineering and Applied Science Letter
ISSN: 2617-9709 (Online) 2617-9695 (Print)
DOI: 10.30538/psrp-easl2019.0024
How to create satisfying high-resolution microscope stitched pictures with limited resources? A simple method applied to cross-sections of teeth
Maxime Bedez\(^1\), Thomas Fasquelle, Cécile Olejnik
Université de Lille, CHU Lille, F-59000 Lille, France.; (M.B)
Universidade de Évora, Palácio Vimioso, Largo do Marqués de Marialva, 7000-809, Évora, Portugal.; (T.F)
Université de Lille, Univ. Littoral Cóte d’Opale, EA 4490-PMOI-Physiopathologie des Maladies Osseuses Inflammatoires, F-59000 Lille, France.; (C.O)
Abstract
Keywords:
1. Introduction
Numerous areas of medicine necessitate observation and evaluation of relatively large zones of interest and with high optical magnification. These observations are generally performed with microscopes that enable to observe a very small part of the area of interest at a time.
Within the last 150 centuries, photography showed a huge development leading to very high quality pictures with relatively simple and light equipment. On the other hand, rise of digital within the last 30 years has considerably changed ways of living and working. Above all, smartphones became more than entertainment objects: they can be used as a reliable and relatively cheap professional tool in a large set of areas [1].
With the development of informatics rose the interest to digitize, annotate, share and enhance pictures obtained with glass slides on light microscopes [2]. In order to facilitate teaching class but also research work with small budget (microscope without camera), smartphone started to be investigated. Morrison and Gardner [3] proposed a simple method to take pictures with a light microscope and a smartphone, without any adapter. Despite the low cost and the easy way of implementation of this method, an operator needs some practice before managing to take clear pictures, and both hands are busy during the process. Several other authors therefore proposed hand-made and cheap adapters [4, 5]. Using an adapter to avoid blurry pictures is essential, since the outlets of this method are numerous. As an example, some authors already proposed smartphone applications in order to perform medical diagnostics [6]. Long-lasting, affordable, efficient and multi-purpose adapters are therefore needed.
As a consequence, companies started to commercialize products that are dedicated to one or several cell phones. Roy et al. [7] performed a comparison between 6 of them (and testing 3 with different smartphones), a home-made one and the direct use of the smartphone, enabling them to provide their own recommendation. On the other hand, some authors started to propose a direct printing of the adapter thanks to additive manufacturing with plastics [8]. This method has the advantage of providing the right tool with a cost-effective manufacturing process, since 3D-printers are becoming more and more affordable and worldwide.
New technologies of light microscope associated with special software tools allow for picture stitching and therefore enable creation of high-resolution pictures of the whole areas of interest, called virtual slides [9]. Thanks to multiple microscope focuses, it is even possible to obtain a 3D view of a slide (whole slide imaging) [10], which can be very useful for particular medicine areas (cytology, hematology, microbiology) [11]. However, these techniques necessitate a substantial investment for the optical tool and the software. These investments could be prohibitive for small budget institution or teaching purpose.
The objective of this work is therefore to find a way to perform 2D planar stitching of non-structured (meaning no particular organization) photographs taken by non-professional camera, with little pre-processing, no post-processing work, and little to no investment needed, in a fast way, to achieve a virtual slide with high-definition. Similar work has already been performed by Lu et al. [12] that proposed a home-made microscope and self-developed software to perform the stitching. Their method is relatively cheap (less than \(400\) and automatic however it necessitates an initial assembly step that is time-consuming and it is more adapted to remote areas that need a diagnostic system than for student classes with the need of dozens of systems.
The methodology that is presented answers that question by using a simple and cheap light microscope, a relatively recent smartphone, an adapter between microscope and smartphone that has been printed on purpose and a free image-stitching software.
2. Experimental setup description
The objective of this work is to propose a cost-effective and simple experimental set-up and method in order to create high-resolution microscope stitched images. Both the equipment and the software products can therefore be exchanged by equivalent.2.1. Light microscope, Smartphone and smartphone adapter
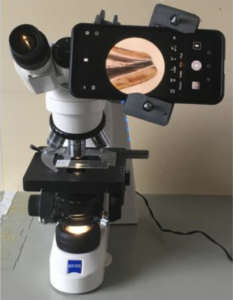
The used light microscope is a simple model from Zeiss (Primo Star). It has a fixed and 20 unique objective (\(\times 10\)) and four different eyepieces (\(\times\)4, \(\times\)10, \(\times\)40 and \(\times\)10.), leading to four possible magnifications: "\(\times\)40", "\(\times\)100", "\(\times\)400" and "\(\times\)1000".
The smartphone adapter has been created with a 3D printer (printer brand: Dagoma, printermodel: Neva, material: polylactic acid (PLA), material brand: ICE). The original model can be found on the website thingiverse.com [13]. It has been modified to fit with the used smartphone (Brand: Huawei, model: P20 Pro) thanks to the free platform tinkercad.com [14]. Experimental setup: smartphone, support and light microscope is shown in Figure 1.
Figure 1. Experimental setup: smartphone, support and light microscope
2.2. Experimental protocol
In order to perform clear, clean and reproducible high resolution pictures, the following 3 protocol has been used:- Stabilize the smartphone camera onto the microscope thanks to the dedicated adapter.
- Adjust the camera (manual focus to the infinite, ISO at minimum, Auto White Balance (AWB) to artificial light, shutter speed (S factor) adjustment is function of luminosity).
- Adjust the microscope (maximum luminosity, microscope magnification: \(\times\)40).
- Taking the pictures with a N-shape itinerary, with 20-40% overlap, in a high-quality raw format (the P20 Pro allows the .dng format).
- Convert pictures with a software in a format that takes into account transparency (in the present work, XnView software and .tif format were preferred).
- Erase the black background thanks to an editing image software (in the present work, Paint.NET).
- Automatically stitch the pictures thanks to a dedicated software. In the present work, the free software Image Composite Editor (protocol in Annex 1) has been used because other tested software products were not providing satisfying results (see Appendix 2).
- Compress the obtained jpeg files to reduce the total weight using a batch processing (in the present work, XnView software to reduce the given quality to 50%).
3. Results and discussion
70 slides were tested with the proposed method. 61 experiments were successful. The latter will be discussed in the following section while the 9 failures will be discussed in Section 0.3.1. Obtained pictures
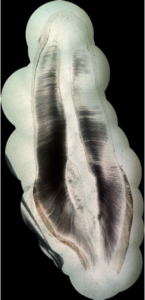
Figure 2 shows one picture of sagittal cross-section of a permanent maxillary central incisor, taken with the experimental set-up that has been described in Section 0 (microscope magnification: \(\times\)40). Picture is round because of the microscope lens. Quality of the picture is acceptable, but an overall view of the tooth cross-section is not possible.Figure 2. One picture taken with the smartphone mounted on the light microscope
Figure 3. The obtained stitched virtual slide, with the different pieces highlighted with the circles
3.2. Needed time and virtual slide weight
One of the advantages of the proposed method is its relatively fast execution for large groups of glass slides. As detailed in Table 1, a total duration of 375 min has been necessary to create the stitched pictures (for instance the example given in Section 0): it results in an average of 5 min per virtual slide.Table 1. Details about the procedure duration.
| Action | Duration (min) |
|---|---|
| Taking pictures of the glass slides | 120 |
| Copy/Paste and conversion to .tif | 30 |
| Erasing black background | 100 |
| Stitching | 100 |
| Jpeg compression | 10 |
| Upload | 15 |
| Total | 375 |
Weights of the obtained files depend on the number of pictures that were taken in order to obtain the stitched figures. In the present case, the latter have between 20 Mpx and 250 Mpx, for a total weight of 2-10 Mo (compressed jpeg), 10-60 Mo (uncompressed jpeg) or 90-340 Mo (tif).
Given the actual glass slides, reducing the quality of the jpeg files that is given by the software to 50% allowed a 75% loss of weight with a satisfactory resolution. Choice of the compression factor is a trade-off between quality and weight. It also depends on the initial quality of the pictures and their application (for instance, cytology requires more quality, thus preventing the use of an important compression factor).
3.3. Increasing resolution/microscope magnification
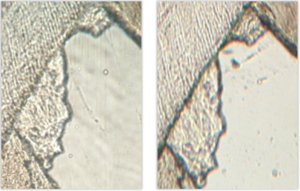
The same method was applied to one sample with a higher microscope magnification (\(\times\)100). Results are compared to the lowest magnification in Figure 4.Figure 4. Equivalent fragments of the same digitalized slide in x100 magnification (left) and \(\times\)40 magnification (right) showing no significant difference
The higher magnification did not show significant enhancement of the obtained pictures, for a relatively important increase of weight (150 Mo for an uncompressed .jpeg format and 750 Mo for a .tif format, against 60 Mo and 340 Mo, respectively). However, this result should not be generalized since the potential image resolution is inherent in the optical system [16].
Even higher magnifications (\(\times\)400 and \(\times\)1000) were available with the microscope; however, the lack of multiple focus planes reduces the depth of sharpness, making such magnifications unusable for virtual slides without z-axis.
3.4. Probable causes of failure
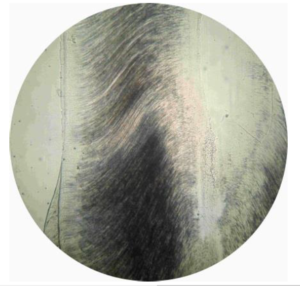
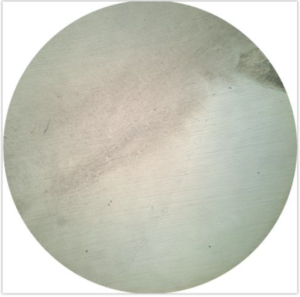
Despite its easy way of use, the proposed method might fail to create the virtual slide. In the present case, 9 stitchings out of 70 failed. The 9 failed stitching consist of three different kinds:- The stitching process is successful, but necessitates an intermediate step.
- The whole stitching process is not successful, but two or three blocks are obtained.
- The stitching process is completely failed, some pictures being not possible to stitch to the others.
Figure 5. Example of a very monotonous fragment of a slide (part of the root)
Table 2. Probable causes of failure and proposed solutions.
| Failure | Solution |
|---|---|
| Not enough overlap between pictures | Take more pictures (higher overlap) |
| Monotonous subject (not enough forms andcolour variations within the studied slide) |
Choosing better slides |
| Lowering light to increase variations | |
| Adding a non-monotonous element on thepicture by displacing the microscope focus |
|
| Not enough contrast | Take new pictures with better adjustment |
| Modify obtained image in post processing |
4. Conclusions and perspectives
4.1. Conclusions
This work is in line with a global investigation about enhancement of microscope sample pictures with high quality, easy way of use and low-cost. Thanks to the progress in informatics, photography and additive manufacturing, it is feasible to meet all these requirements and create satisfying high-resolution stitched pictures of microscope glass slides with limited resources.
While previous works focused on the way of performing pictures of the microscope viewpoint with smartphone, the present method goes beyond and create large pictures that stitch them into a single high-resolution image representing the objects of interest (in the present case, teeth). Up to now, image stitching of microscope pictures was reserved to high-quality high cost microscopes and/or proprietary software products.
As a conclusion, the present works gathered all the separate knowledges that were presented to provide a simple and efficient method that can be used by researchers, teachers or students to create virtual slides that can be studied as a whole and also feed online database.
4.2. Perspectives/Alternatives
In order to enhance the proposed method, one may:- Use professional software (additional cost).
- Use a dedicated support for the smartphone (additional cost).
- Use a higher-resolution microscope (additional cost).
- Use a microscope with an integrated picture function (additional cost).
- Perform a thorough pre-processing (time consuming).
- Manually assemble the pictures with an image editor (time consuming).
- Use better microscope glass slides (additional cost).
5. Appendix 1: Image Composite Editor's stitching protocol
In order to reproduce the protocol that has been executed in this work, one may follow the procedure hereinbelow:- Open the software ICE.
- Add images by using "New Panorama" or by doing drag-and-drop.
- In "Import", stay in "Simple Panorama" and put "Camera Motion" in "Auto-Detect" or "Planar Motion" (preferred here).
- Click on "Next" or "Stitch".
- In "Stitch", modify picture orientation if necessary.
- Click on "Next" or "Crop".
- In "Crop", cut the image if necessary.
- Click on "Next" or "Export"
- Save the picture on the hard drive (preferred format: "JPEG image" with quality "Superb".
6. Appendix 2: Tested software products 1
Different software products were tested for the proposed protocol. They were discriminated because of the reasons that are summarized in Table 3.Table 3. Discriminated software products.
| Software | Reason |
|---|---|
| Photoshop (with tracing paper fusion) | Stitching fails: resulting image is out of shape |
| DeepSkyTracker | Necessitates numbered images and following a logical path (i.e. forbidding the use of a non-assisted by microscope protocol) |
| Fiji (ImageJ) with "stitching" plug-in | Necessitates numbered images and following a logical path (i.e. forbidding the use of a non-assisted by microscope protocol) |
| PhotoStitcher (free version) | Limited functions on free version |
| Histostitcher | Does not handle numerous images and with high overlapping |
| Image stitching | Stitching fails: resulting image is out of shape |
| Autostitch | Stitching fails: resulting image is out of shape |
| MIST | Necessitates numbered images and following a logical path |
7. Appendix 3: Other examples of obtained stitched pictures
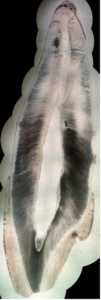
In this appendix, some examples of obtained pictures are given ( Figures 6, 7, 8). A more important set of pictures is provided in [15].Figure 6. A second example of high-resolution stitched picture of a sagittal cross-section of a permanent maxillary central incisor
Figure 7. A third example of high-resolution stitched picture of a sagittal cross-section of a permanent maxillary central incisor
Figure 8. A fourth example of high-resolution stitched picture of a sagittal cross-section of a permanent maxillary central incisor
8. Appendix 4: Contextualization of magnification comparison and another example
Here we give Contextualization of magnification comparison (see Figures 9, 10).Figure 9. Same slide with \(\times\)40 magnification (left) and \(\times\)100 magnification (right), showing no significant improvement
Figure 10. Another example of magnification comparison, \(\times\)40 on the left, \(\times\)100 on the right, showing no significant improvement
Author Contributions
All authors contributed equally to the writing of this paper. All authors read and approved the final manuscript.Conflicts of Interest:
The authors declare no conflict of interest.References
- Morrison, A. O.,0 & Gardner, J. M. (2015). Microscopic image photography techniques of the past, present, and future. Archives of Pathology & Laboratory Medicine, 139, 1558-1564.[Google Scholor]
- Leong, F. J. W., & Leong, A. S. (2003). Digital imaging applications in anatomic pathology. Advances in Anatomic Pathology, 10(2), 88-95. [Google Scholor]
- Morrison, A. S., & Gardner, J. M. (2013). Smart phone microscopic photography: a novel tool for physicians and trainees. Archives of Pathology and Laboratory Medicine, 138(8), 1002-1002. [Google Scholor]
- Mondal, H., Mondal, S., & Das, D. (2017). Development of a simple smartphone adapter for digital photomicrography. Indian Dermatol Online J, 8, 485-6. [Google Scholor]
- Singaravel, S., & Aleem, M. A. (2016). Hands-free: a low-cost adapter for smartphone microscopic photography using a cardboard toilet-paper roll. Archives of pathology \& laboratory medicine, 140(8), 741-743.[Google Scholor]
- Hartman, D. J., Parwani, A. V., Cable, B., Cucoranu, I. C., McHugh, J. S., Kolowitz, B. J., ... & Lauro, G. R. (2014). Pocket pathologist: a mobile application for rapid diagnostic surgical pathology consultation. Journal of pathology informatics, 5(10).[Google Scholor]
- Roy, S., Pantanowitz, L., Amin, M., Seethala, R. R., Ishtiaque, A., Yousem, S. A., ... & Hartman, D. J. (2014). Smartphone adapters for digital photomicrography. Journal of pathology informatics, 5(24). [Google Scholor]
- Fontelo, P., Liu, F., & Yagi, Y. (2015). Evaluation of a smartphone for telepathology: lessons learned. Journal of pathology informatics, 6(35). [Google Scholor]
- Farris, A. B., Cohen, C., Rogers, T. E., & Smith, G. H. (2017). Whole slide imaging for analytical anatomic pathology and telepathology: practical applications today, promises, and perils. Archives of pathology & laboratory medicine, 141(4), 542-550. [Google Scholor]
- Hamilton, P. W., Wang, Y., & McCullough, S. J. (2012). Virtual microscopy and digital pathology in training and education. Apmis, 120(4), 305-315. [Google Scholor]
- Dee, F. R. (2009). Virtual microscopy in pathology education. Human pathology, 40(8), 1112-1121. [Google Scholor]
- Lu, Q., Liu, G., Xiao, C., Hu, C., Zhang, S., Xu, R. X., ... & Smith, Z. J. (2018). A modular, open-source, slide-scanning microscope for diagnostic applications in resource-constrained settings. PloS one, 13(3), e0194063. [Google Scholor]
- Thingiverse, "Universal telescope eyepiece smartphone mount V2,". Retrieved from https://www.thingiverse.com/thing:2232096.
- Tinkercad. Retrieved from https://www.tinkercad.com/.
- Bedez, M. "Prodibi database," Retrieved from https://drbedez.prodibi.com/a/011lx7z0l0zwm74.
- Blake, C. A., Lavoie, H. A., & Millette, C. F. (2003). Teaching medical histology at the University of South Carolina School of Medicine: Transition to virtual slides and virtual microscopes. The Anatomical Record Part B: The New Anatomist: An Official Publication of the American Association of Anatomists, 275(1), 196-206. [Google Scholor]

